

Whether you're working from home or meeting with people in other locations, Outlook can help you ensure every meeting is online. Simply enable the Add online meeting to all meetings option to get started.
Note
This feature applies to Microsoft 365 accounts only.
Turn this option on or off
The setting is enabled by default if you have a Teams license. However, if you wish to change the setting, you can do so in one of the following ways.
In Outlook
You can find the setting to make all meetings online in all Outlook clients: Outlook for Windows (new and classic), Outlook for Mac, Outlook on the web, Outlook for Android, and Outlook for iOS. Look for the setting in the Options menu for your specific client.
In Windows PowerShell
IT admins can also programmatically configure the setting for their entire organization.
- To configure for the organization, admins should use the OnlineMeetingsByDefaultEnabled parameter from the Set-OrganizationConfig cmdlet.
- The OnlineMeetingsByDefaultEnabled parameter controls whether to set all meetings as Teams or Skype for Business by default during meeting creation. The parameter sets the default value, so if a user already directly interacted with this setting from a supported Outlook client, this default value set by the admin is ignored. In other words, the settings of the mailbox and organization configuration apply if the user never changed the settings from a supported Outlook client.
- Admins set the defaults, and they apply for new users, but only if the settings aren't modified by the client.
- If the client turns on the settings, the settings of the organization and calendar are ignored.
- The admin can't check the client settings.
- The admin has no way to query your settings.
Choose your default online meeting provider
For users
If you have both Microsoft Teams and Skype for Business installed, your preferred provider depends on the selected coexistence mode. You won't see an option to choose between Teams and Skype.
If you use a single online meeting provider, like Microsoft Teams or a partner's Office Add-in, Outlook automatically sets it as the default provider.
If you use both Microsoft Teams and a partner provider (or multiple partner providers), Microsoft Teams is the default provider unless you change it. If you don't have Microsoft Teams installed but use multiple partner providers, the priority goes to the one installed by your organization's admin.
You can select your preferred online meeting provider in the following scenarios:
- Your organization's admin installed multiple partner provider add-ins.
- You installed multiple partner provider add-ins and the admin didn't configure a default meeting provider.
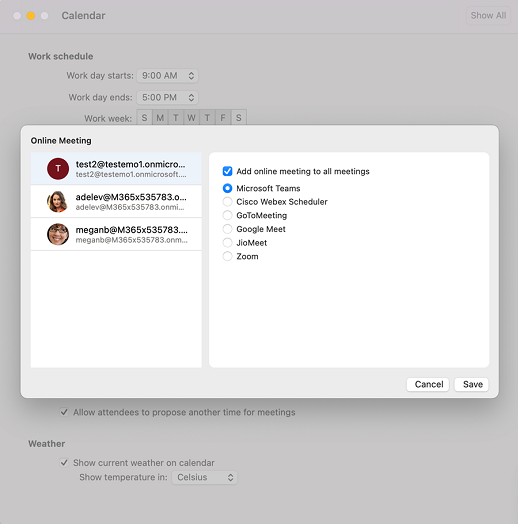
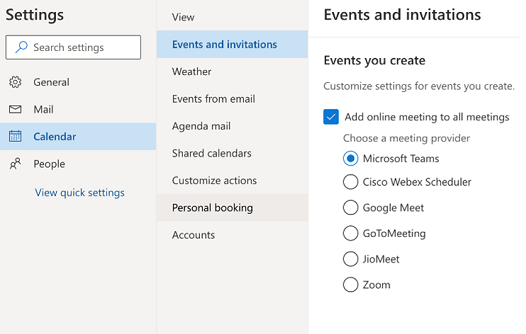
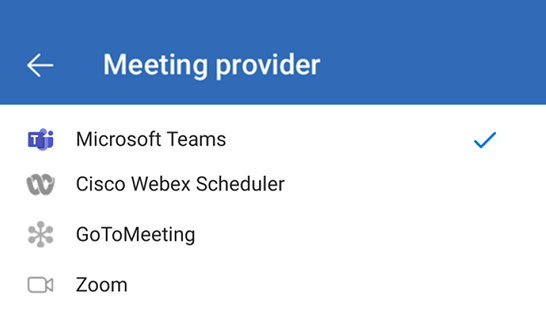
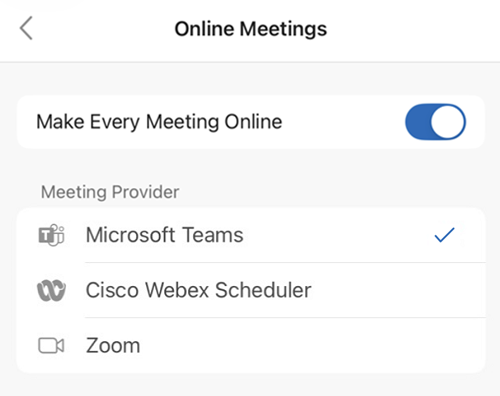
You can find the setting to choose your preferred provider in Outlook on the web, Outlook for Windows (new and classic), Outlook for Mac, Outlook for Android, and Outlook for iOS. The preferred provider you select on one supported Outlook client applies to all supported clients you use.
Select the appropriate tab for detailed instructions on how to find this option in your Outlook client.
For administrators
To set the default meeting provider as an admin, use the Set-MailboxCalendarConfiguration cmdlet from Exchange Online PowerShell. See the following steps:
Connect to Exchange Online PowerShell by using the
Connect-ExchangeOnlinecmdlet.Run the following cmdlet:
Set-MailboxCalendarConfiguration -Identity user@contoso.com -DefaultOnlineMeetingProvider ZoomThe
DefaultOnlineMeetingProviderparameter is only available in the cloud-based service.In this example, you set Zoom as the default online meeting provider.
Use one of the following values in the
-DefaultOnlineMeetingProviderfield:- AlibabaDingTalk
- AmazonChimePrivate
- AmazonChimePublic
- AppleFacetime
- ClaroVideoconferencia
- FacebookWorkplace
- GoogleMeet
- GoToMeeting
- JioMeet
- RingCentral
- SkypeForBusiness
- SkypeForConsumer
- TeamsForBusiness (This value is the default.)
- Webex
- Zoom
Reference: Set-MailboxCalendarConfiguration (ExchangePowerShell) | Microsoft Learn
Set-MailboxCalendarConfiguration -Identity user@contoso.com -DefaultOnlineMeetingProvider Zoom
To select your default online meeting provider and make every meeting online in classic Outlook for Windows, follow these steps.
Select File > Options > Calendar.
Under Calendar options, go to Add online meeting to all meetings, and select Add Meeting Provider.
Select the Add online meeting to all meetings checkbox.
From the Apply to this account dropdown menu, choose the account for which you'd like to enable the setting.
From the list of online meeting providers, choose the default provider for your selected account. This list includes all providers relevant to your account.
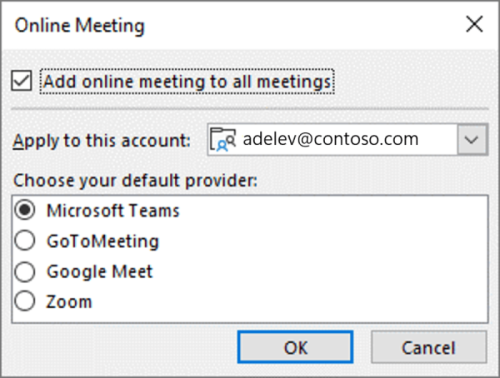
Select OK.
Supported online meeting providers
When you select a preferred online meeting provider, each user's setup personalizes the list of available providers.
Microsoft Teams and Skype for Business are shown based on the user's assigned licenses.
Partner providers appear based on the Office Add-ins that the user or the admin installs. The following online meeting add-ins are supported:
Important
Partner providers' COM add-ins aren't supported. If you enable the Add online meeting to all meetings option and use a provider's COM add-in to add meeting details to an appointment, both Microsoft Teams and the provider's meeting details might be added. To prevent this from happening, perform one of the following workarounds.
- Uninstall the provider's COM add-in (for step-by-step instructions, see View, manage, and install add-ins in Office programs), then install the Office Add-ins version of your preferred provider from the links in this section. For further guidance, see Choose your default online meeting provider.
- If your preferred meeting provider doesn't have an Office Add-ins version, disable the Add online meeting to all meetings option to continue using the COM add-in. For guidance on disabling this option via Outlook or Windows PowerShell, see Turn this option on or off.
Locate the add-in of your online meeting provider in Outlook
The Add online meeting to all meetings option automatically adds the meeting details of your preferred provider to your appointments. If you need to configure the meeting details, use the meeting provider's add-in to make changes.
To access your meeting provider's add-in in Outlook for Windows (new and classic), for Mac, and on the web, perform the following steps:
- Select New Meeting or New Event to create a new meeting.
- In the newly created meeting, go to the ribbon and select your meeting provider's add-in.
Tip
For administrators: To help users easily locate your organization's preferred online meeting provider add-in in Outlook on Mac, run a script to pin the add-in to Outlook's ribbon. For more information, see Pin online meeting add-ins to the ribbon.
Additional information
- Online meeting details aren't added to events that are longer than 24 hours or to any event without attendees.
- If you manage a shared calendar or delegated calendar and the calendar owner updates the preferred provider, it might take up to 24 hours for that selection to appear on your copy of the shared calendar.
- The feature isn't available yet when using classic Outlook for Windows if your mailbox is hosted in GCC, GCC-High, or DoD environments. Users in these environments get the feature when using other Outlook clients.
Minimum Outlook versions required
| Outlook client | Option to make all meetings online | Option to select preferred provider (if multiple providers enabled) |
|---|---|---|
| Classic Outlook for Windows* |
|
|
| Outlook for Mac* |
|
|
| Outlook on the web New Outlook for Windows |
|
|
| Outlook for Android |
|
|
| Outlook for iOS |
|
|
*Applies only to users who purchased Microsoft Office on a monthly or yearly subscription basis.
1Only supports Microsoft Teams starting with Version 1.0.20275.4 of the Teams add-in. Available starting in Outlook Desktop Version 2011 (Build 13330.00000).
2Available starting in Version 2206 (Build 15330.20176) for the Monthly Channel and Version 2207 (Build 15427.20176) for the Monthly Enterprise Channel.
3Available starting in Version 16.60.318.0.
4Available starting in Version 16.57.1205.0.