

To change the text fonts, colors, or general look of objects in all worksheets of your workbook quickly, try switching to another theme or customizing a theme to meet your needs. If you like a specific theme, you can make it the default for all new workbooks.
To switch to another theme, select Page Layout > Themes and select the one you want.
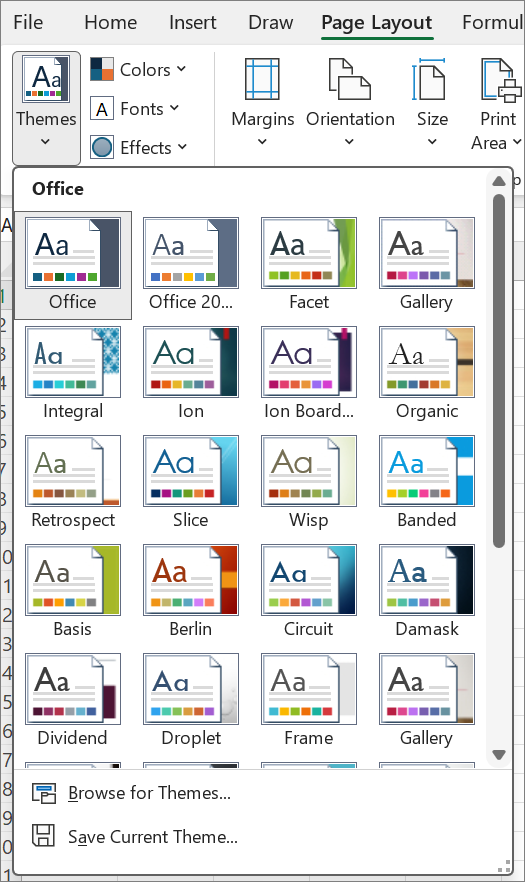
To customize that theme, change its colors, fonts, and effects as needed. Save the changes with the current theme and make it the default theme for all new workbooks.
Change theme colors
When you select a different theme color palette or change its colors, you change the available colors in the color picker and the colors you used in your workbook.
Select Page Layout > Themes > Colors and select the set of colors you want.
The first set of colors is used in the current theme.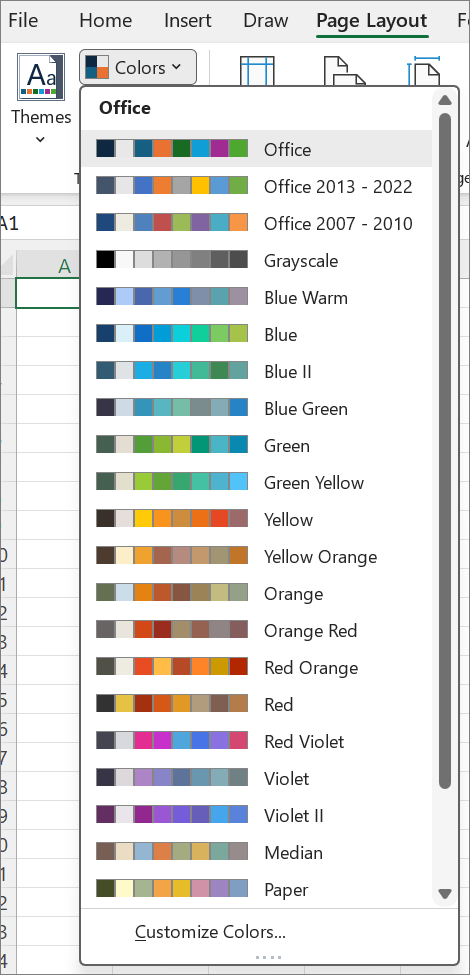
To create your own set of colors, select Customize Colors.
For each theme color you want to change, select the button next to that color, and then select a color under Theme Colors.
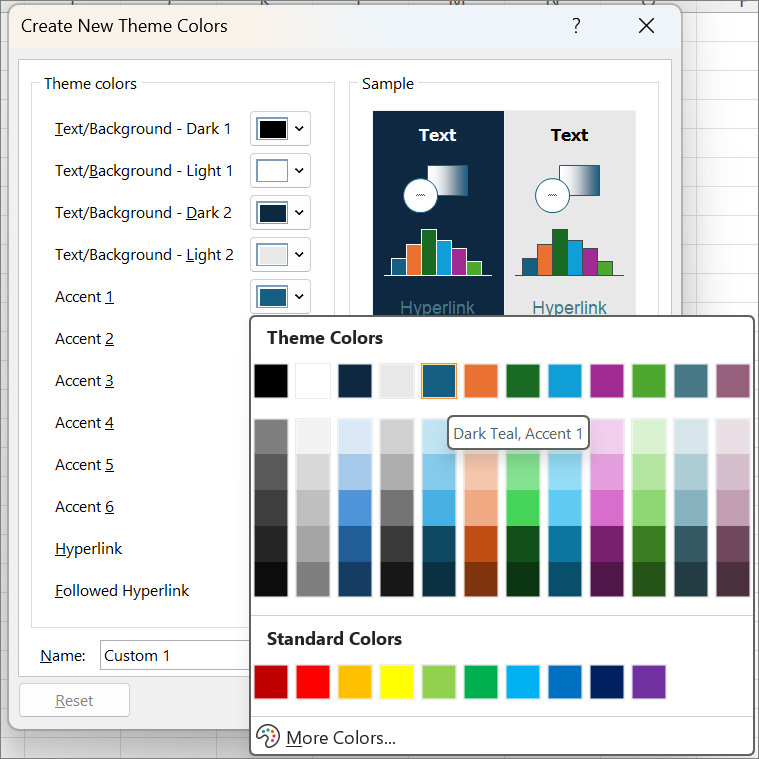
To add your own color, select More Colors, and then select a color on the Standard tab or enter numbers on the Custom tab.
Tip
In the Sample box, you get a preview of the changes you made.
In the Name box, type a name for the new color set, and select Save.
Tip
Select Reset before you select Save if you want to return to the original colors.
To save these new theme colors with the current theme, select Page Layout > Themes group > Themes > Save Current Theme.
Change theme fonts
When you select a different theme font, you change all your text at once. For this feature to work, format your text by using Body and Heading fonts.
Select Page Layout > Themes > Fonts and choose the set of fonts you want.
The current theme uses the first set of fonts.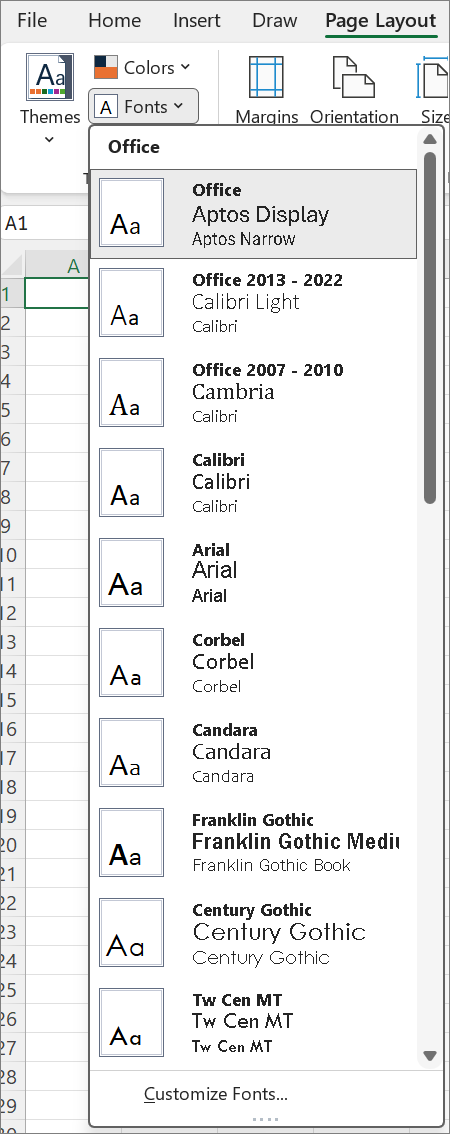
Select Customize Fonts to create your own set of fonts.
In the Create New Theme Fonts dialog, select the fonts you want in the Heading font and Body font dropdown lists.
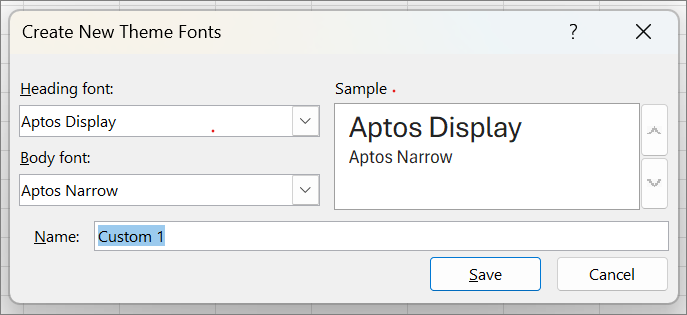
Type a name for the new font set in the Name box, and then select Save.
To save these new theme fonts with the current theme, select Page Layout > Themes group > Themes > Save Current Theme.
Change theme effects
When you select a different set of effects, you change the look of the objects you used in your worksheet. The effects apply different types of borders and visual effects, like shading and shadows.
Select Page Layout > Themes group > Effects and choose the set of effects you want.
The current theme uses the first set of effects.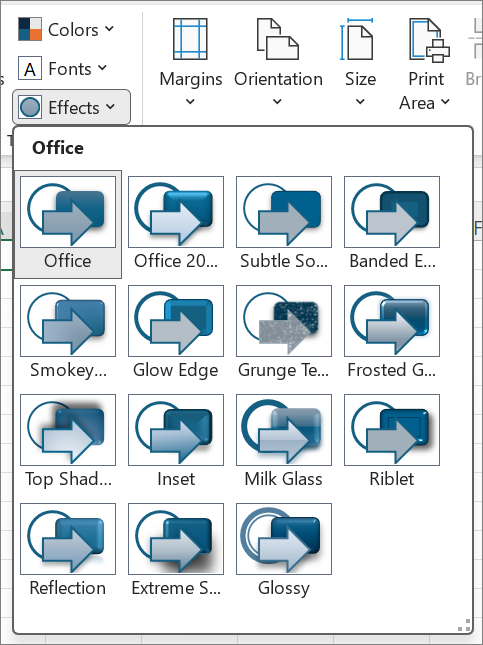
Note
You can't customize a set of effects.
To save the effects you selected with the current theme, select Page Layout > Themes group > Themes > Save Current Theme.
Save a custom theme for reuse
After making changes to your theme, save it to use it again.
Select Page Layout > Themes group > Themes > Save Current Theme.
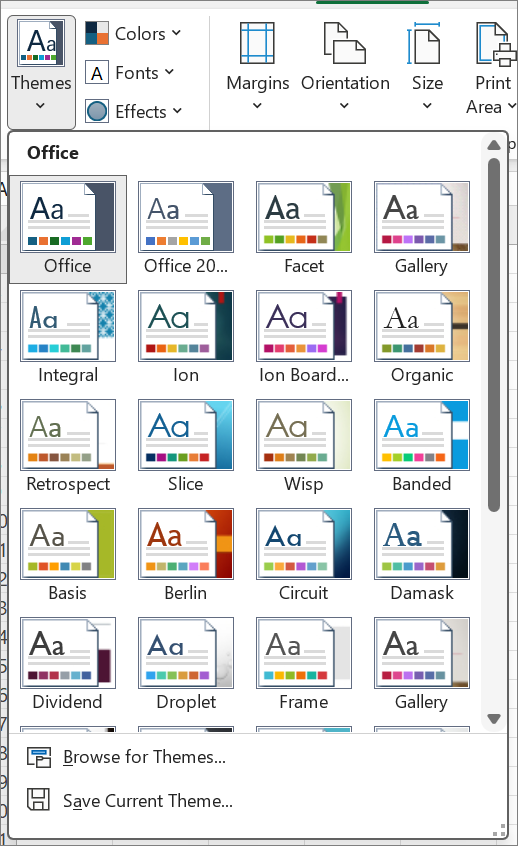
In the File name box, type a name for the theme, and select Save.
Note
The theme is saved as a theme file (.thmx) in the Document Themes folder on your local drive. Excel automatically adds it to the list of custom themes that appear when you click Themes.
Use a custom theme as the default for new workbooks
To use your custom theme for all new workbooks, apply it to a blank workbook and then save it as a template named Book.xltx in the XLStart folder (typically C:\Users\*user name*\AppData\Local\Microsoft\Excel\XLStart).
To set up Excel so it automatically opens a new workbook that uses Book.xltx:
Click File > Options.
On the General tab, under Start up options, clear the Show the Start screen when this application starts checkbox.
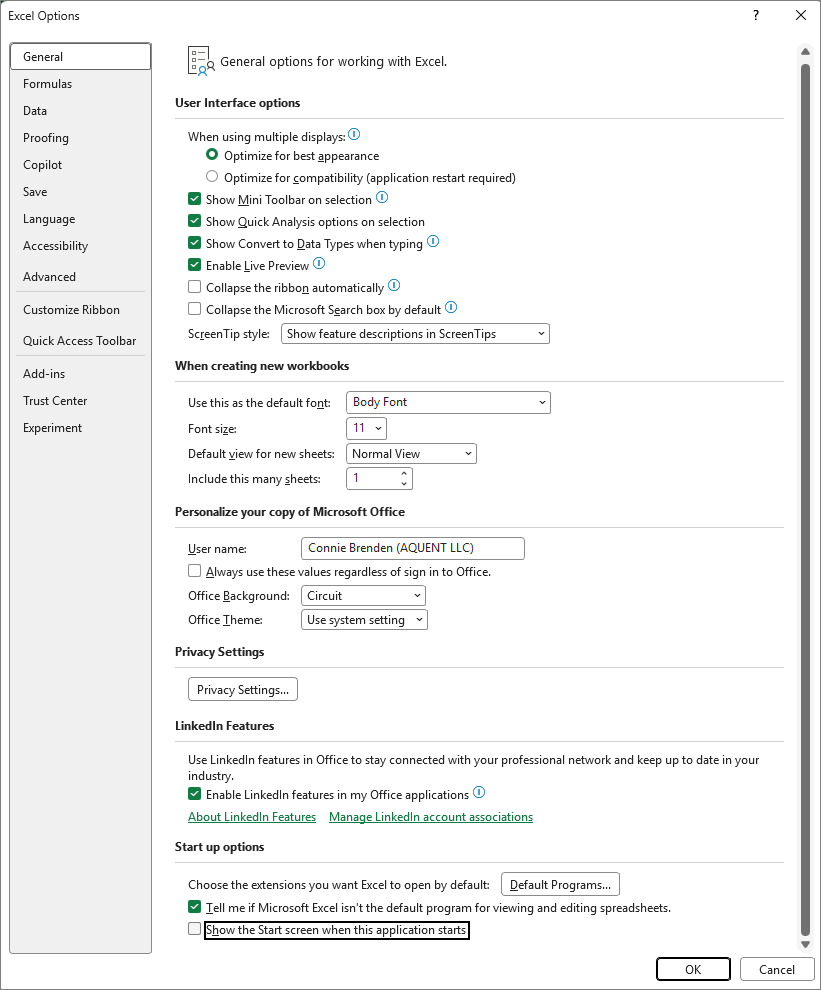
The next time you start Excel, it opens a workbook that uses Book.xltx.
Tip
Pressing Ctrl+N also creates a new workbook that uses Book.xltx.